Dr. Strange VFX Recreation: VEX Code Crash Course
I like to call this week “the week that Sydney fully realized she accidentally decided to learn VEX coding this semester”. Needless to say, I got pretty deep into VEX coding this week in order to tackle the main aspect of this shot recreation: the ripple movement of the cobblestones. I will be the first one to tell you that I am no professional programmer, I learned Java very briefly at the beginning of college so I know some basic rules of coding, but my VEX knowledge has pretty much just been gathered through working in Houdini and watching other people write VEX code that I utilize at times for some of my projects. However, this week really plunged me into the deep end of problem-solving through code, because apparently I unknowingly chose a shot that would finally make me face my fears and hesitations on coding for VFX.
As usual, I’ll go over the easier small stuff I did during the week first. The simplest thing I did to begin was create a basic grid to act as the dirt in between the cobblestones, since Nelson had pointed out and I had also noticed that the cobblestones and the magic stream looked a bit odd without the dirt filling in the gaps. For now all the dirt is quite literally an extruded grid geometry with the cobblestones cut out of it, but eventually I’ll cut out the section of dirt around where the moving cobblestones are and replace it with the vellum grain simulation I’ll be implementing later on. For now though, just try your best to ignore the dirt grid left behind as the cobblestones move away.
I then decided to revisit the grid of cobblestones I created and modify it a bit, since I had gotten feedback last week saying that the cobblestones still looked a little too uniform, which was amplified by the new texturing I put on them. I addressed this issue in 2 ways: 1.) by adding another cobblestone variation to be copied to the points of the grid, and 2.) by altering the way that I created the grid of points and trying a different method of offsetting the lines.
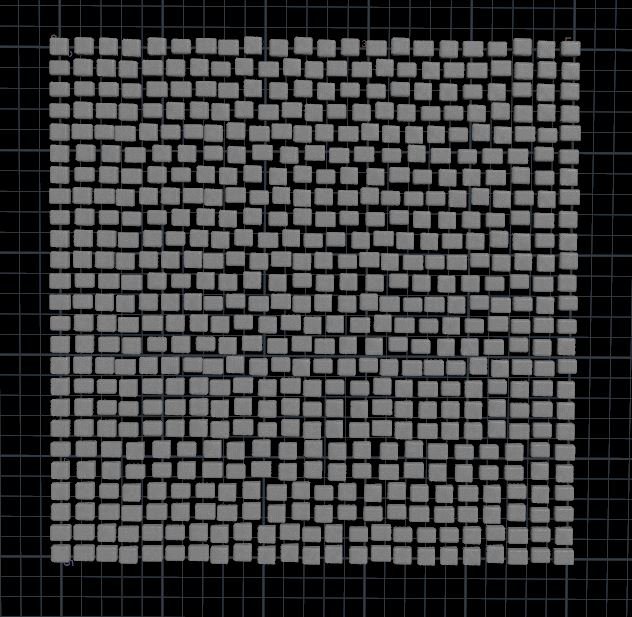
Something that had always stood out to me when I looked at the cobblestones in my reference shot was that the rows of stones aren’t perfectly uniform in a grid, but they also aren’t uniformly offset per row. The grid looks very organic and natural, with different offsets for each line and even varying amounts of stones per row. That was something I was unaware of how to do initially, so I just moved past it, but last week Nelson showed me a nice little line of code I could utilize alongside a for each loop to determine how the x-axis lines are copied onto the points from the z-axis lines.
My previous method just consisted of creating a line and using the copy node to create multiple instances of it to form the grid. This new method allowed me to still achieve that same effect, but also vary the amount of points per line with a random function fit to a set range. So, what I ended up settling on was a base number of 22 points that would have somewhere between 3 points added and 3 points removed per line. Copying the cobblestones to this new point grid, I finally felt like I was on the right track to get that organic-looking line variation I had been looking for, though there’s still some weird uniformity going on with some of the rows that’s amplified by the camera angle of my shot. More variations to come next week on that, as usual.
I went into trying to figure out how to get the ripple movement of the cobblestones with a strange optimism that maybe it wouldn’t be too hard after all, since I had been given the starting clue that I should look into utilizing an attribute transfer node from the magic stream to drive the ripple. The end goal was simple enough: create an attribute that would store the information of what points the magic stream had touched, setting that point as “active” and letting it be moved along the curves I previously created. My first instinct was to utilize the values generated by the curveu attribute I could add to the magic stream lines through a resample node, since it stores the length information on a given geometry. I tried creating a new attribute I called “stream” utilizing the values generated by the curveu attribute and transferring that to the cobblestone movement curves, which proved only semi-successful.
The points on the cobblestone curves did in fact receive a stream value correlating to if the magic stream had passed through them or not, but I was missing that middle piece of how to utilize those values to dictate whether a point could be moved across those curves or not. I also ran into an issue of the stream attribute generating values varying from 0-0.9 or so, with many points being given a weird decimal value in between, when really what I needed was for the value to be either 0 or 1 to classify whether it was active or not. The furthest I got in utilizing that attribute to affect the way in which each point was moved through the carve node was having each point travel only as far as the stream value dictated once the magic stream ran through them-- which gave me an interesting diagonal arrangement of the cobblestone points in the end, but not the effect I desired.
This was where I hit my first big wall in progress, which was made very frustrating by the fact that I knew what I needed to do, I just didn’t know how to make it happen with the knowledge at my disposal both from past experiences and through scouring the internet. Discouraged and lost, I finally decided to reach out to a friend who I had previously talked to for help with basic VEX coding and who also happens to be my classmate in the small group of students Nelson decided to take on in a mentorship for this semester, Mubashir (please check out his website, he makes some really cool stuff and I owe him so much for helping me out!).
Thanks to Mubashir’s help, I was finally able to get the delayed movement I had been fruitlessly attempting for far too long, while also learning a lot of new things about VEX coding in the process. The method that he introduced me to utilized 2 attributes, one to be stored by the points on the cobblestone grid which would later be the attribute referenced in the carve node to decide when and how fast to move each point (which I repurposed my “stream” attribute for), and one to dictate which points the stream had touched in order to activate them (which I simply called “mask”).
To break it down very simply, the stream attribute is first created on the points on the cobblestone curve, just set with a value of 0 to begin with. Then, the magic stream geometry is imported in with the stream attribute created on its points that are all set to a value of 1. The mask attribute is then copied onto the cobblestone curve points, which is then utilized to continuously add a set value to the stream attribute based on which points had been touched by the magic stream and therefore had a mask value of 1. Everything from the magic stream geometry import onwards is done within a solver node, which is done to ensure that the attribute values are continuously added to instead of overwriting themselves each time Houdini runs through the node tree, since the actual movement of the cobblestones is dependent on the stream value continuously increasing on each frame.
Finally, outside of the solver node again, we get to the carve node which utilizes the stream attribute as the “first U” value and moves the singular start point from one end of the curve to the other only when the magic stream reaches it and the stream value is added to. The set value added to the stream attribute back in the solver node also helps to dictate the speed at which the point travels across the curve, since you’re essentially telling the carve node how much to move the point for every frame.
Hopefully that overview of the coding process made a little bit of sense at least— I’m still definitely learning how to write out explanations of everything going on within the code in a comprehensible way. Though it definitely was an intimidating process initially and I do talk a lot about how coding is not my favorite thing in the world, I’m actually very grateful for this opportunity to learn more about VEX code, since I have been slowly dipping my toes into VEX and realizing how powerful it is the more I work on creating VFX in Houdini.
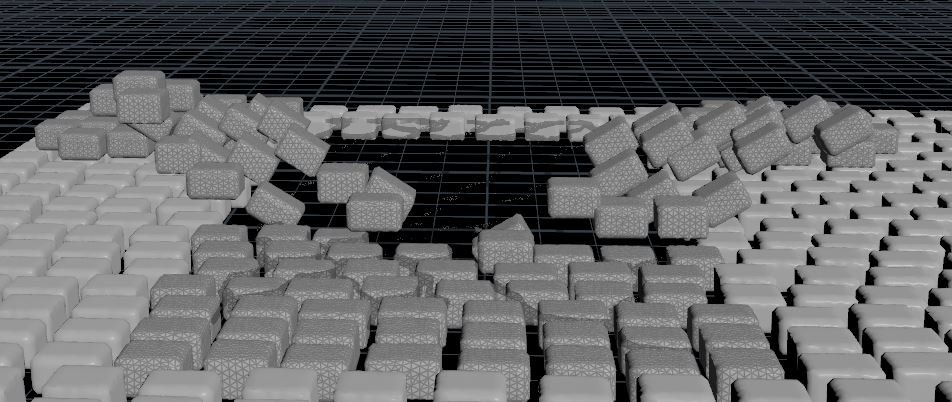
Once I had gone back and cleaned up some of my nodes and streamlined both the magic stream and the cobblestones node setup (I may or may not have accidentally created a sort of scary loop between the two nodes through various object merges that was only kept from a total paradoxical disaster by a file cache), I brought everything back into Solaris to render out what I think is the first real base pass of this shot recreation.
It’s a bit rough still to say the least, but I achieved my biggest goal of getting the cobblestones to move according to the growth of the magic stream, so I can’t complain too much. I still need to figure out how to delay the rotation of the cobblestones just as I did with the movement, but so far none of my trial and error on that front has worked out fruitfully unfortunately. But that’s a problem for next week after I’ve had some time to not stare at this project and have gotten some feedback to help me along the way.
After last semester’s grueling pace of working on one main complicated effect that was the fire magic, it has been a bit of a breath of fresh air to feel like I’m making progress more consistently this semester and have more to show for it each week. It’s definitely an apples and oranges situation to compare though, since the two VFX shot recreations are vastly different in the types of effects they deal with and the methods used to create them, but either way I’ve definitely appreciated feeling a bit less unqualified to be working on a shot. In a strange way I sort of miss working with pyro though… but perhaps nostalgia has clouded my judgment of the pain I endured while working on my project last semester. I’m sure I’ll be eating my words soon enough about my work this semester being less grueling once I get to the vellum grain simulations for this shot, which will be my first real escapade into vellum simulations!