Scarlet Witch VFX Recreation: Refining Outer Orb
Another week another round of refinements and adjustments! Last week I was able to get the base outer orb in place, giving me all the pieces that I needed to get the base setup for the Scarlet Witch’s magic. However, the look of it wasn’t quite right just yet, so this week I began to tackle sharpening the definition of the outer orb utilizing some techniques I practiced in previous weeks.
If you remember from one of my last posts, I experimented with the millions technique in order to create a large and wispy particle system to mimic the kind of effect I would later use for my project. I already implemented some of what I learned through the millions tutorial in the creation of the outer orb particle system itself, but one thing I didn’t delve that deep into was wedging and the TOPs network. To be honest I was pretty intimidated by it at first, especially since I didn’t know much about it, so I avoided it for the time being while I was just trying to create the particle effect to begin with. But, after further research, it became increasingly clear to me that wedging was an important tool to learn and an essential part of the millions particle effect— and the TOPs network itself is also a very great tool to know.
So, after learning more about how to wedge my particles and how the TOPs network functions, this week I worked on creating multiple wedges of my outer orb particle effect in order to truly get the detailed millions VFX look, rather than the less defined shape I ended up with previously. Before doing so, I did also edit my outer orb particles after some advice from my professor, who helped me further push the shape of those tendrils in the outer orb. The base effect was there, but after editing it more this week, I was able to get the tendrils to be more defined within the orb and really get them to clump together more to create those more clear shapes.
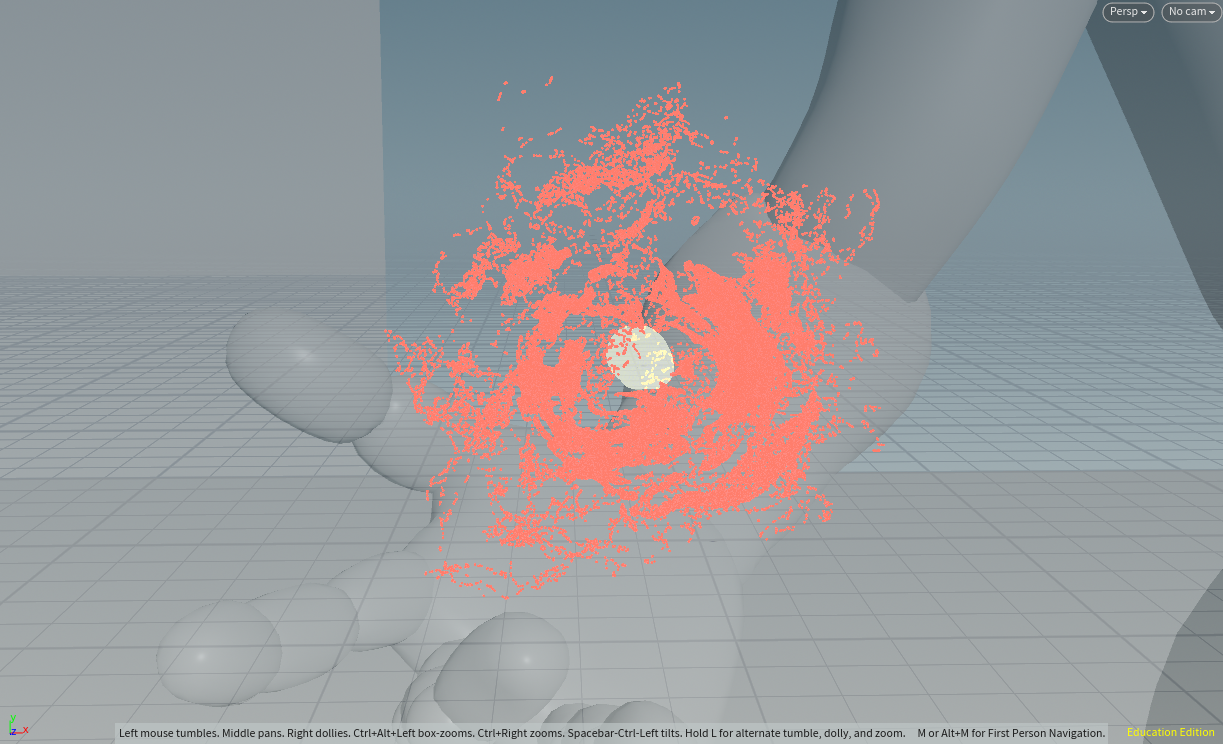
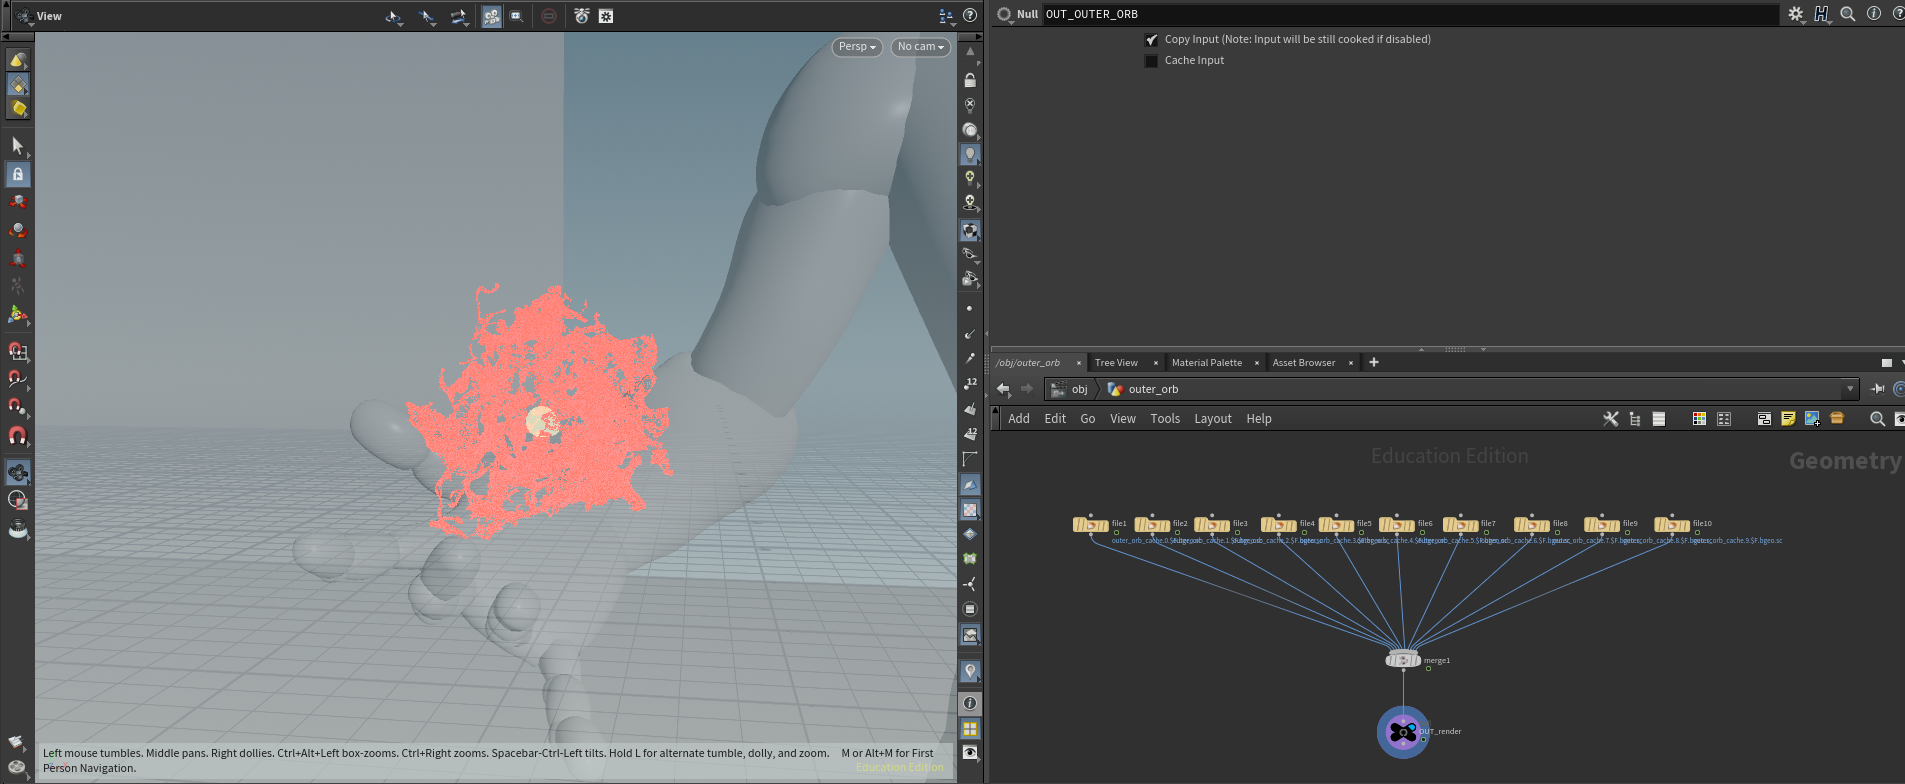
After I was satisfied with the adjustments to the outer orb, I went ahead and edited the particle emissions for the POP net and had it emit about 350,000 particles throughout the duration of my shot. Then, I went in and wedged 10 slightly different versions of those particles, ending up with 3.5 million particles in total when I merged them all together. It was a super cool difference to see the amount of detail I could get from making the particles much smaller and having tons more particles, and definitely taught me the importance of wedging these kinds of effects. Especially since rendering all these wedges only took me about an hour in total, and for 10 versions of 72 frames of many particles, that’s pretty damn good. Though I will admit, it does look a little crazy in the node network to import all the files of all the different particle versions. Behold my army of file imports!
After successfully rendering and importing all my wedges, I took them back into Solaris and played with the material I was using for the outer orb, trying out different kinds of materials based on different variables like life, age, and intensity of energy to figure out what looked best. I ended up settling on a material dependent on how long each particle had been active, which allowed me to get a more natural looking taper on the edges of my effect rather than full intensity all the way through.
Following the usual rendering and re-uploading of my files into Nuke, I continued to play around with comping my FX and adding different glows and blurs onto them. I also very subtly animated the red glow and lens flare I had placed over the entire effect, since it was pointed out to me that it made the shot look a little stagnant compared to the movement of the magic itself. I also went back to the core and tried my hand at adjusting it once again to try and get the shaping looking better, along with the general glow that seems to follow it around. I even re-rendered some of the shapes of the core from Houdini to bring back into my comp, and though I still don’t think it’s perfect, it’s definitely getting closer to the look of my reference. Overall though, I’m happy with the progress I was able to make this week, and I’m happy that I was finally able to start some detail work to refine this animation!
Not too extensive of a post this week since most of the stuff I did was adjusting pretty small details, but I do think that’s a good mark of progress! Next week I want to focus on creating those large branching tendrils that appear every so often on the perimeter of the outer orb, since I think that’s the last secondary component that’s missing from the magic. I also still want to make both the outer orb and the core feel more volumetric and dimensional, since both of them get a bit flat and washed out towards the middle of each respective effect. I also feel like I need to make the movement of the red glow and lens flare around the magic less subtle, I’m still trying to find that sweet spot in not having it feel jerky but also having the movement still be noticeable. Always plenty more details to refine and overall looks to adjust!