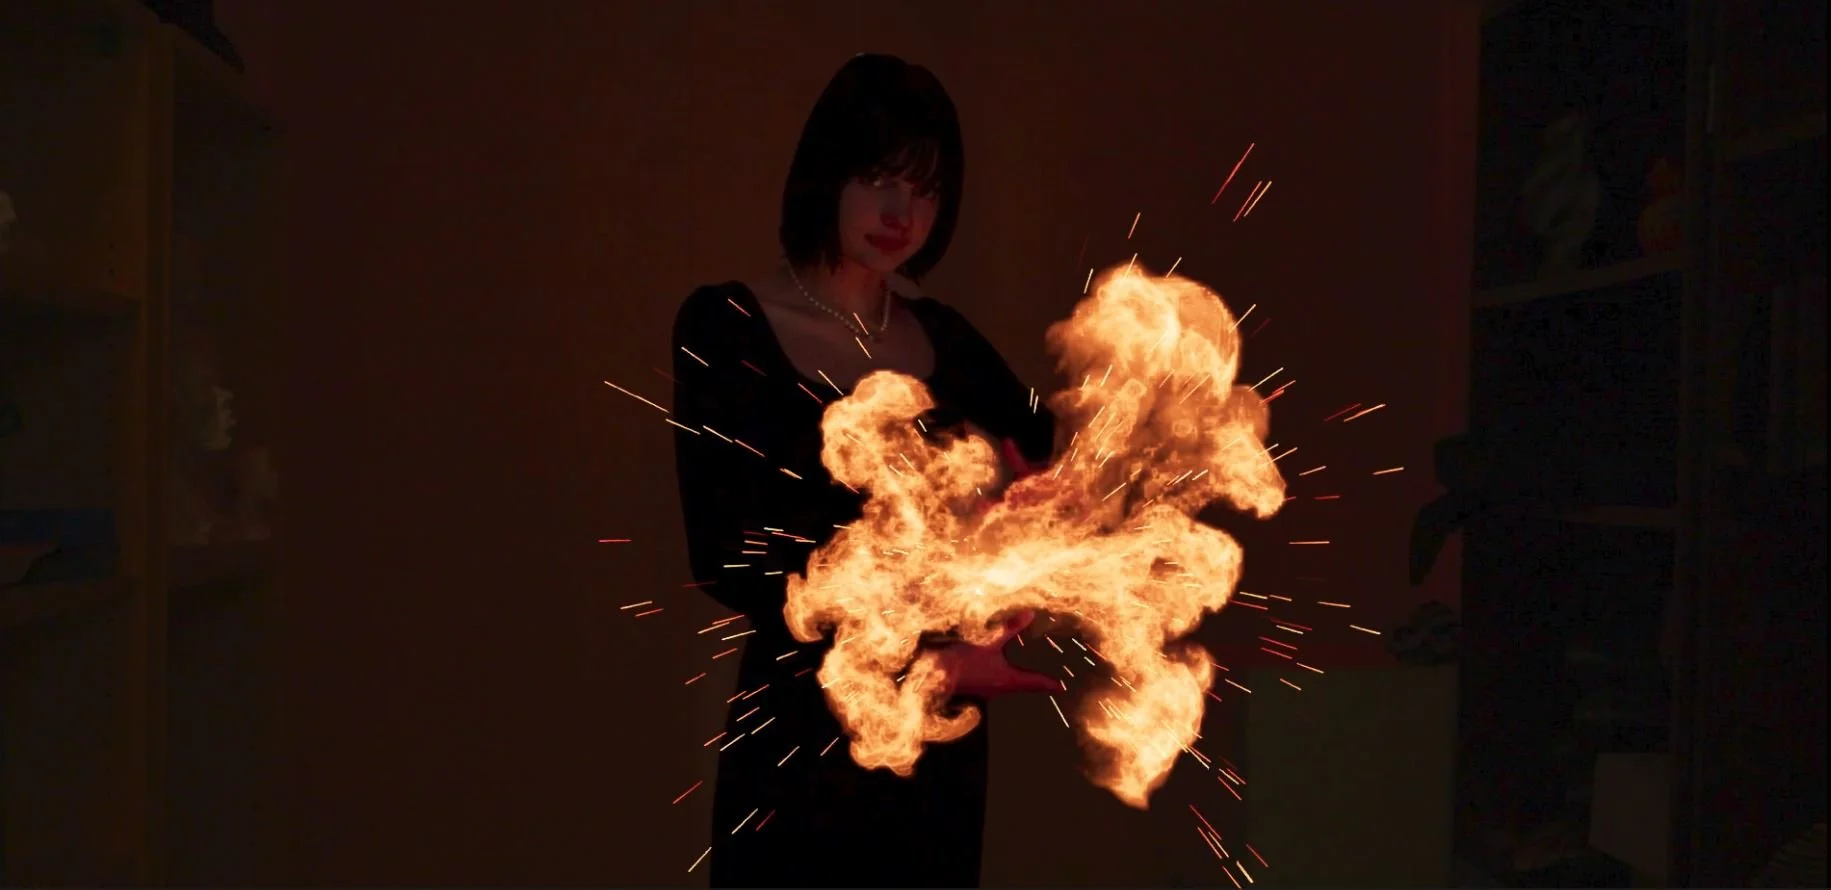
The Nevers Fire VFX Recreation: Final Wrap-Up
At long last, I have finally made it to the end of the semester and am back to posting on this blog! I know I haven’t been super consistent with my updates for this semester unfortunately—due to both an extremely packed schedule and also Square Space getting a little mad at all the drafts I had piling up and deleting some of them. But I finally was able to find the time to polish up this final wrap up post to delve into the final result of all my hard work.
For a while I didn’t think I would make it with how busy I was to be honest, especially with an end product that I was satisfied with, but I’m happy to say that all my struggles were worth it in the end. So, without further ado, let’s get into the breakdown of my final shot recreating the fire magic VFX from HBO’s The Nevers!
Initial Burst
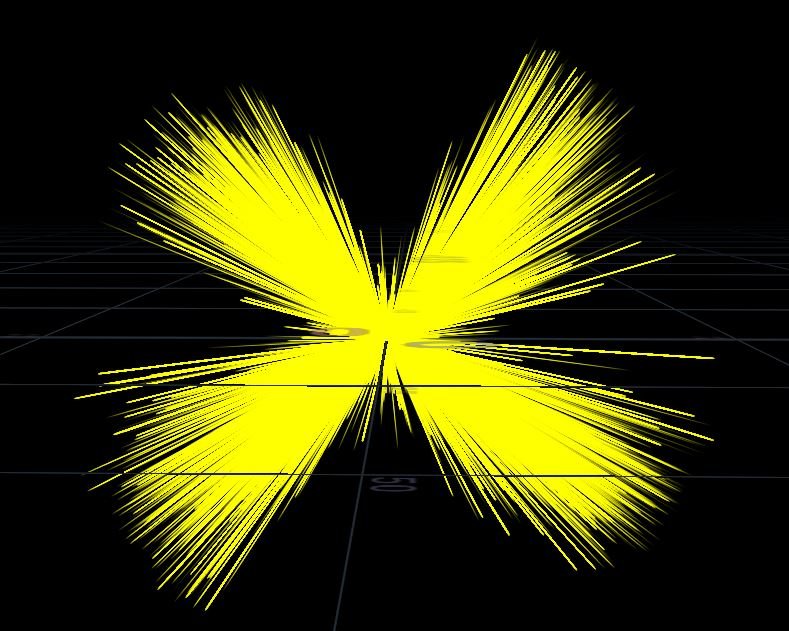
Many of my blog posts have been detailing my struggles with the initial burst of fire, but after lots of trial and error and help from Nelson, I was finally able to get it looking a lot more accurate to my reference. The setup that ended up working the best in the end was creating the source of the burst and the velocity of the burst separately in order to maximize the control I had over the shape it created. I started once again with a sphere, utilizing its normals to create an outward bursting velocity field. I then clipped the sphere to only retain a section of it, repeating this 3 more times to get the 4 sections of my butterfly wing velocity field.
Velocity field from clipped spheres
I then used a simple attribute wrangle to adjust each section of the velocity field to get the kind of asymmetrical butterfly shape I desired before merging them all together to make one velocity field. After this, I applied 2 noises to the velocity to break up the shape and make sure the fire was not super smooth when shooting out. Then all that was left was to use an attribute transfer to transfer the velocity onto my base fire source geometry, which was relatively simple— a cluster of small deformed spheres copied to points through a pop net where the fuel would start before bursting outwards in the direction of the velocity field.
Final velocity field for initial burst
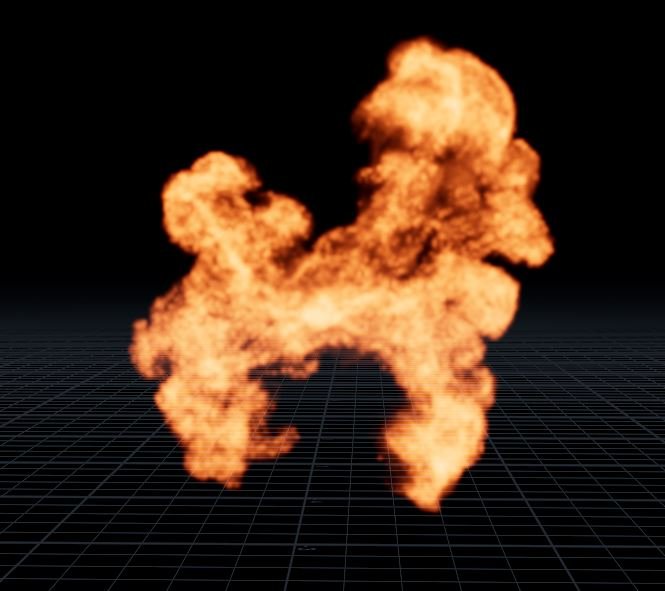
After that, the refinement of the initial burst was essentially just me slowly getting the hang of the pyro solver and figuring out through many tests how to adjust certain parameters to get my desired shape. My biggest saving graces were disturbance and turbulence, both of which really helped to finish the job to make my fire burst look and act like the flames in my reference shot. All of that trial and error finally left me with this!:
Final initial burst (non-render view)
Flame Shell + Flame Streams
Next was my true nemesis from this project: the flame shell. I lost count of how many different setups I tried to get this element to act right, but no matter how many particle systems or spheres I used, nothing was working out quite right for a while. But, after taking another good look at and studying my reference shot from the Nevers, Nelson and I concluded that it seemed the flame shell was formed by some sort of spiraling curve.
Keeping this in mind, I utilized the spiral geometry to create a circular ring to emit the fire from. I then threw a poly wire on the curve and added some variation to its thickness by using an attribute vop, and got a nice spiraling velocity field by key framing the spiral spinning and trailing the velocity from there.
Flame shell base geo
After that, all I had to do was once again fight with the pyro solver node in order to minimize the amount of flames licking off of the ring and try to get it to stick to the base geometry as much as possible.
Final flame shell (non-render view)
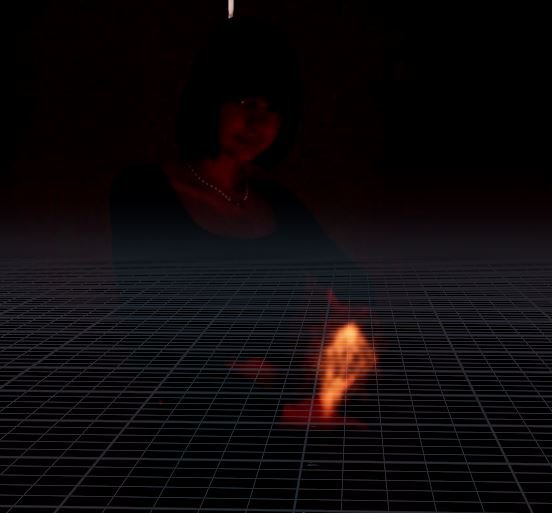
However, the real life saver for the flame shell was combining it with the flame streams coming from my hands. The flame streams were relatively simple in construction, they were both comprised of identical partical systems emitting from a small sphere geometry. The velocity for these spheres was directed in a line in each of their respective directions towards the flame shell, deformed and given a bit more variation through a point noise node.
Flame stream base particle system
Then, as usual, I just played with the pyro solver to contain the flames as best as I could. They don’t look that impressive on their own, but once I animated them along with the flame shell to move in tandem with my hands from my base footage, the combined effect was not too bad looking! (you’ll have to trust me on this one that it came out much better once it was fully rendered)
Final flame streams (non-render view)
This is one element I do feel that I still want to revisit and learn more about, especially since I feel that I had such a breakthrough about it a little too late in the game to fully explore. But, I can’t complain at the very valuable knowledge I gained on the journey of trying to figure this simulation out and being able to learn more about how the actual effect from The Nevers was created as well.
Sparks
Finally, the last element to add to my project was the sparks. Going back to my comfort zone of sparks and particle systems after struggling for so long learning pyro was definitely a breath of fresh air, though it was still exciting to revisit an effect I learned how to make early on in my journey and figure out new ways to refine it.
Though relatively simple, this sparks setup was a bit more unique than the sparks that I’ve worked with previously. In particular, a very notable and pretty aspect of the sparks from the shot from the Nevers is the fact that the sparks linger for a relatively long time and float around like pixie dust after bursting out initially. I knew that was an aspect I had to make sure to include in my final sparks simulation, though it was a little tricky to figure out how to get just right.
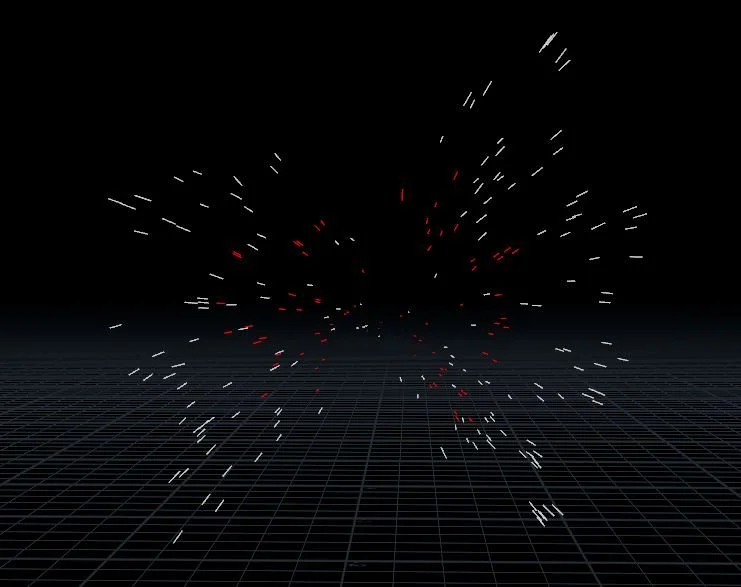
What I ended up doing was creating 2 pop sources within my pop net, both of which were driven by the velocity field I created for the initial burst. The first pop source created a group of particles that bursted fairly far outwards and died off quickly afterwards. The second pop source created a group of particles that didn’t burst out quite as far and that lingered for much longer before dying out. Another notable difference between these 2 pop sources was the gravity forces being enacted on them. Usually I try not to mess with the gravity force too much so I don’t take away from the realism of their behavior, but the pixie dust sparks required me to bend the laws of gravity just a little bit— I ended up lowering the gravity force being enacted on the second pop source by a fair amount, which finally allowed for those sparks to float around and not fall to the ground quite as fast.
Sparks base particle simulation
After the initial spark creation, another new element I needed to add to them was the splitting sparks. This is something I haven’t actually tried my hand in creating before, but it was very interesting to figure out! Thanks to a collection of SideFX resources and online tutorials, I was able to create a varying splitting sparks geometry from copying a line to a random collection of points, and then copying those line clusters to a random percentage of sparks from my main burst. I keyframed some of the parameters on the splitting spark group creation node in order to dictate how long the splitting would occur and also how many splits would appear.
single split spark
Split sparks copying to points on main sim
Finishing off the sparks was just a couple noises and attribute vops to vary the width, color, and intensity of the brightness of the sparks, which ended up not being too difficult to refine thankfully once I remembered to actually add a material to my sparks when I imported them to Solaris.
Final sparks (non-render view)
Compositing
At long last, all my simulation work in Houdini was complete! But, that didn’t mean I was out of the woods just yet— I still had the joys of compositing waiting for me in Nuke. Compositing fire was both easier and harder than I thought it would be, but it definitely made me learn a lot of new ways to manipulate my comps and bring out the details from my elements. I think the most valuable thing I learned in the compositing process was how to luma key my elements in order to make the brightest parts of them even brighter, adding a lot more dimension and detail to the overall look of the fire.
Another first for me in comp was working on scene integration and adding environment glows, which was a lot of fun to explore. Luckily enough, my lovely friend Vy helped me shoot the base footage to have some lights on my face already to mimic the glow of the fire, so all I had to do was enhance those existing light areas in comp. I even added an expression to animate a flicker to the glow to get more of a realistic look for the light from the fire!
The last thing I had to do in comp was work on roto masking my hands from the original footage so I could mask out the areas of the fire that should be covered by my hands, which was by far the most tedious part of the comp process. I ended up using after effects to do the actual roto mask first, since it’s smart masking tool helped to alleviate some pain from the process of going frame by frame refining the mask. I will say though, the work was definitely worth it— it really makes all the difference for the final integration of the VFX elements to really feel like they exist in a 3D space and are interacting with real-life objects and people.
Shot before compositing
Shot after compositing
Final Shot
So, after a whole semester of struggling and many all-nighters, I finally ended up with this end product!
I would be lying if I said there wasn’t more things I want to refine in this shot in the future, but I do have to take a step back and congratulate myself for getting this far. I definitely did not go into this semester knowing how much work it would be to learn pyro simulations in Houdini, but I can say without a doubt that I have learned a ton in these past few months. This was my first time working with volumes and fluids in Houdini, and I definitely can understand why some people can build a career just out of mastering them— so much respect to people who have really mastered these kinds of complex simulations!
Though it wasn’t as consistent as I would’ve liked, I wanted to say thank you once again to those of you that have followed my journey full of ups and downs this semester, or to those that have just taken the time to read through this very lengthy wrap-up post. Another huge thank you of course goes out to Nelson Lim, who once again has humored my ideas and helped me through many technical difficulties throughout the semester, and continues to help me learn more about Houdini and the wonderful world of VFX.
My capstone project for my final semester at UTD will in fact be another exploration into Houdini VFX simulations with the guidance of Nelson Lim— who has graciously allowed me to pester him about Houdini for another semester. I’m excited to share the proposal I’ve been crafting, it’ll be very fun to combine all the knowledge I have gathered so far to produce something I’m really proud of as my last project before I graduate. I hope to share more consistent progress again this semester now that my schedule has cleared up a bit, so please look out for that in the future!


