Scarlet Witch VFX Recreation: Core Creation
Trial and error seemed to be the theme of my work this week as I delved into the nitty gritty of actually starting on the magic for my Scarlet Witch magic recreation. First up was the hot inner core of the magic, a brighter orange/yellow in coloration and seemingly moving slightly more independently than the other magic. Luckily to create this core I was able to use many techniques that I already knew of without delving into particle systems just yet— I just scattered some points on a sphere, and used noise patterns on those points and also the sphere itself to get this morphing ball of energy.
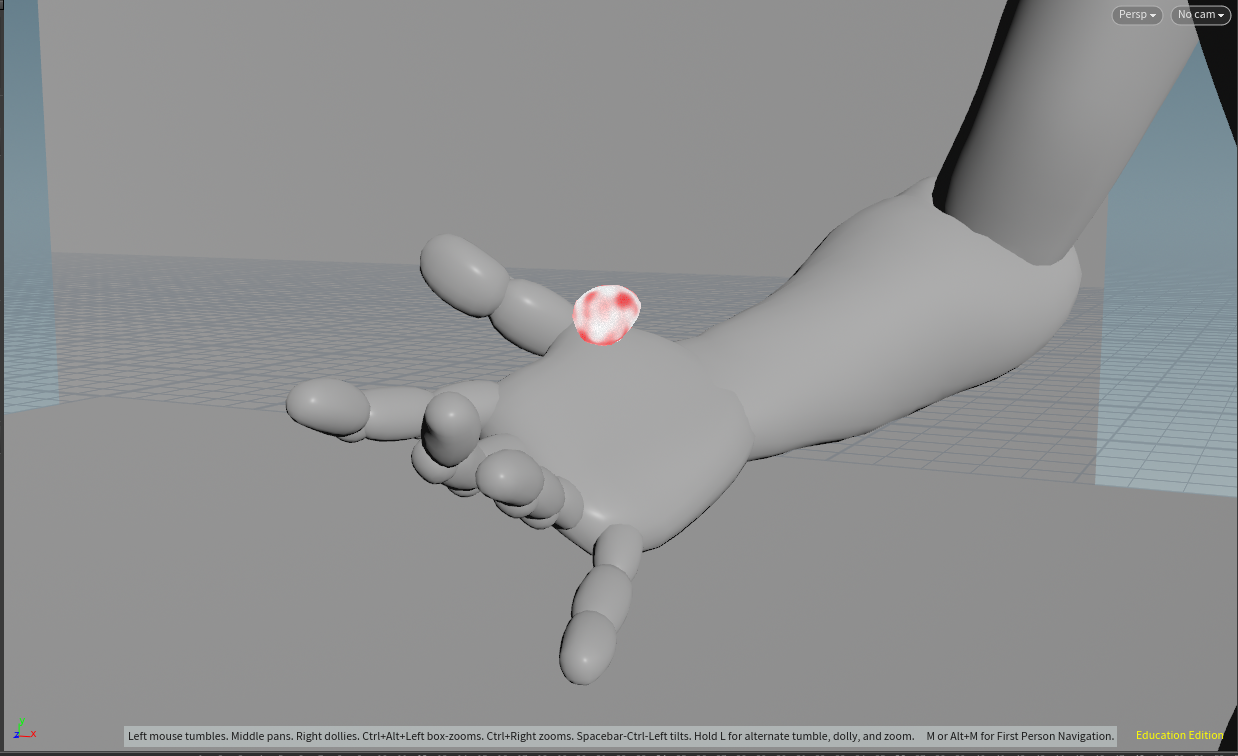
After I had the base shape down, it was time to bring the core into the Solaris context in order to see how it looks when rendered. All was fine and dandy up until this point, which I realized that for some reason, the Karma render view was not showing my core identical to how it looked in the regular Houdini viewport. It seemed that the core would automatically become bigger when shown in the Karma render view, which was quite the issue for me, since the core of the Scarlet Witch’s magic is quite small in my reference shot.
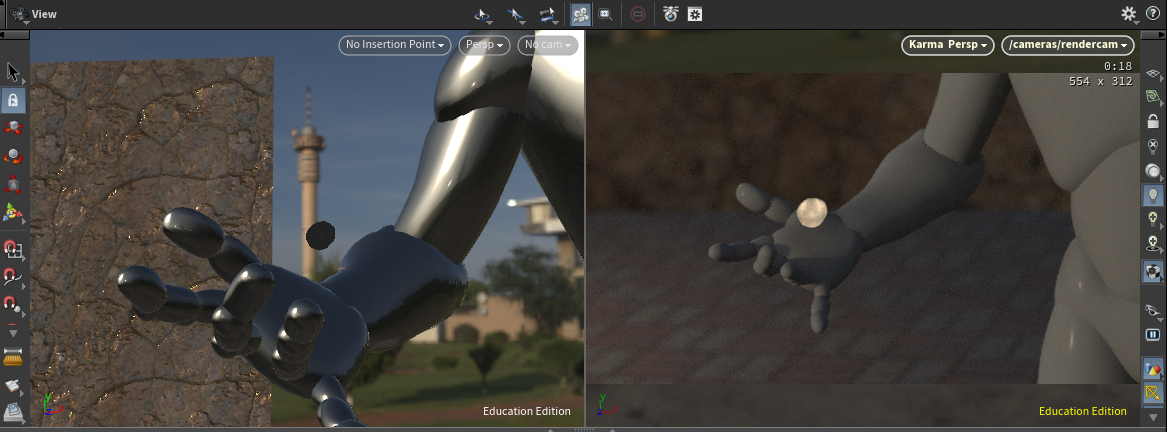
It may seem like a minute difference in this photo, but the biggest kicker was that when I tried to size down my core even more than what is shown here, the core in the Karma render view would get even bigger! I wasn’t sure if it was some kind of visual bug or something I just didn’t know how to work around, but nevertheless, I pressed on to begin animating my core. I messed with both the noise pattern and transforming the base sphere of the core in order to mimic the movements from my reference shot, however, I think my methods still need some troubleshooting before I call the animation for the core done. I’m not entirely satisfied with it thus far, but I didn’t want to dwell too much on it in the moment, since my goal was to get the core to comp so that I can start testing out different ways to enhance my FX in post.
So, I brought my very rough core animation into Nuke to comp everything together, which actually went surprisingly smoothly. It’s been a little while since I used Nuke for a Lighting & Composition class in one of my previous semesters (which I actually quite enjoyed), but I was able to regain my bearings relatively quickly and begin working down the pipeline to enhance my shot. After everything was said and done, I ended up with a pretty clean looking shot, my main focus being to try and match the glow effects from my reference and adjust the background for contrast.
My biggest critiques on this first comp WIP are that the colors are a bit off and the red of the magic needs to be a bit cooler, and honestly the outer red glow should probably just be bigger overall. Now to be fair, it was a bit hard to gauge what size that outer glow needed to be since I didn’t have the outer orb of magic actually there for reference, but I think that’ll be easy to adjust once I add the other magic VFX in there, and will really enhance the overall look.
Speaking of the other part of the magic—though I didn’t actually create it in my scene this week, I did watch a tutorial and begin playing with the method I plan on using to create that larger outer orb of power. I was recommended by my professor to utilize the millions method in order to create this wispy magic effect, though this is something that was completely new to me. So, I followed this great tutorial on millions magic in Houdini by Sadjad Rabiee, which follows him through his process in creating this really cool wispy magic tornado FX. Even though I was a bit lost at times following the nodes he created, I ended up with a really cool result in the end that gave me a better understanding of how this particle system works!
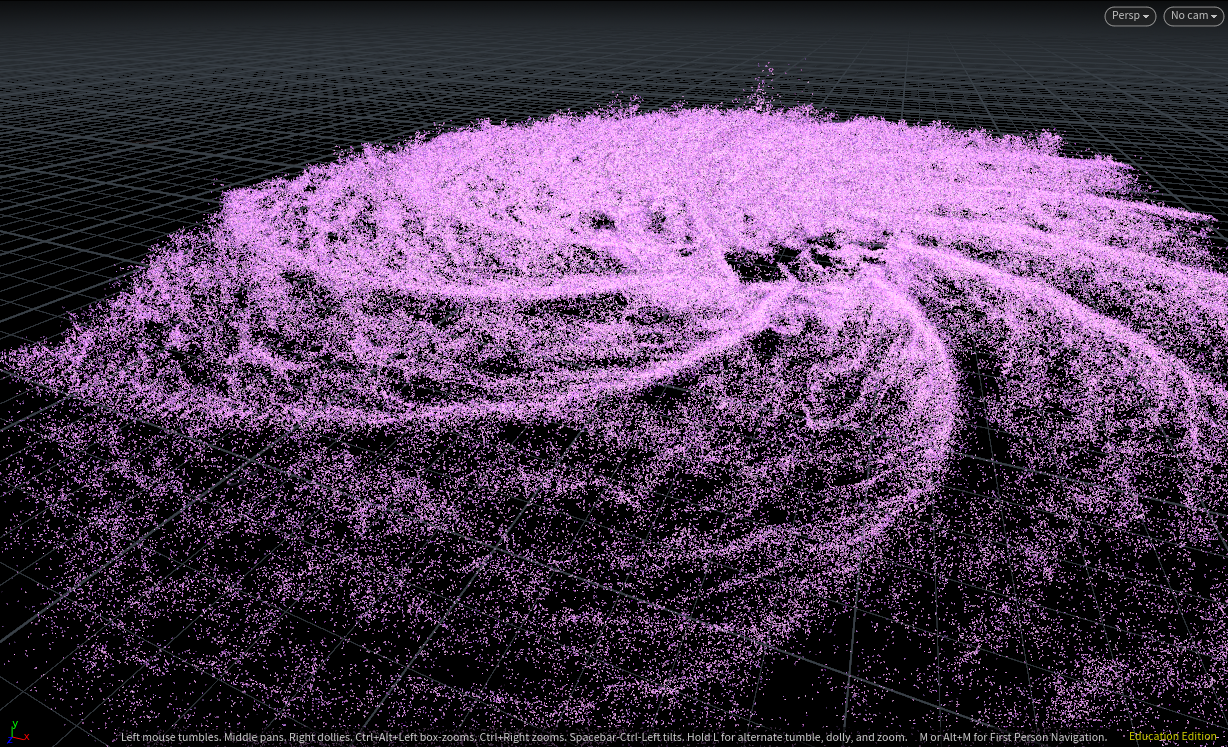
After following the tutorial faithfully, so came the time for me to go off on my own and try and create a similar effect but with my own twist on it, and boy was it harder than I was expecting. My main goal in my spin off project was to change the shape of the particle emitter, and try and figure out a way to evoke the Scarlet Witch-esque tendrils that are present throughout her magic. After lots of testing and failed attempts, I ended up with what I like to call my tendril storm.
It’s still a little messy, and definitely not as cool looking as Sadjad’s work, but it at least continued to teach me more about how the millions particle systems worked—though I know I still have a lot to learn to be able to properly utilize it for my project. My main issues I found lie in trying to create actual 3D objects for the particles to emit from rather than just through flat grids, and also in learning what exactly the best method to render out these particles is (hence my screen recorded demo video as opposed to fully a rendered one). This method is still a little intimidating to me, but I think the effect it creates is really cool, so I look forward to familiarizing myself with it more in the future!